SLS-4 Morph Sliders
Free PreviewMorph Sliders
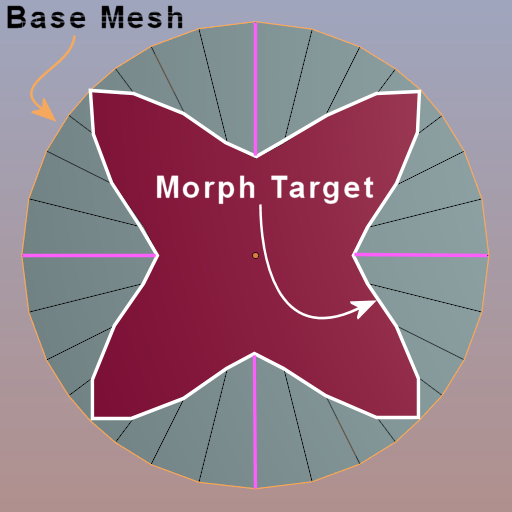
The concept of Mesh Morphing is based on 2 Meshes:
- The Base mesh
- The Morph Target
Both meshes have the same amount of vertices, edges, and Faces. And they use the same topology (the same wire model if you like to say so).
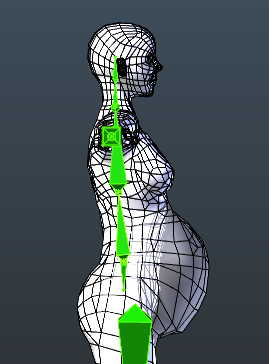
Thus you can draw a morph-transition line from each vertex of the Basis mesh to its corresponding counterpart on the Morph Target.I have indicated 4 of the transition lines in pink. All other transition lines are black (in the image aside)
In the image i used a morph percentage of 50% (Morph value = 0.5). You can see that in this case each vertex of the mesh travels exactly half way (50 %) along its transition line. Look at where the morphed Mesh crosses the transition lines. You will see each line is crossed exactly in its middle.
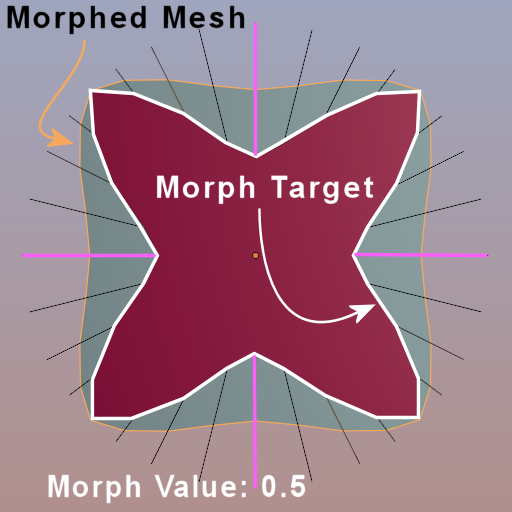
Note: The Second Life Morph Sliders actually define the morph percentage. So now you know why the sliders use values from 0 to 100.
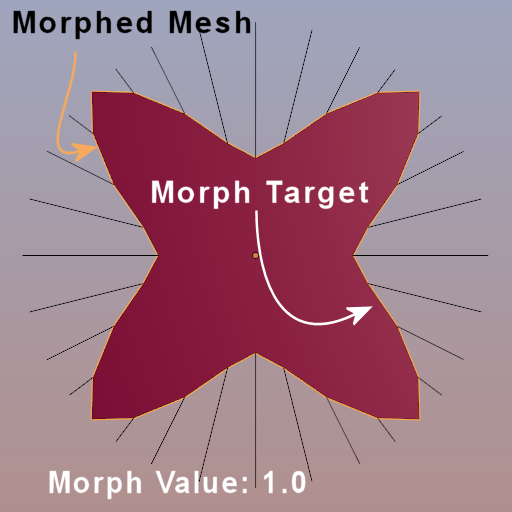
Morphing and Mesh topology
It is very important to understand that all Morph Targets have to use the exact same topology with the exact same number of vertices, edges and faces. This is the only way to ensure that the base mesh transforms exactly and without ambiguity into the Morph Target at 100 %
Belly size Slider value 0%
Belly size Slider value 100%
You may think of the mesh being a balloon that gets more and more inflated with increasing Slider values.
Sidenote: Sometimes people think that fitted Mesh is a replacement for Morphs and it would work exactly like Morphs. But this is entirely wrong. Fitted Mesh has nothing to do with Morph Shapes and it creates different results!
Morphing with Blender
Despite the fact that SL does not support Morphing for Custom Meshes, you still can make use of Morph shapes while you create your meshes in your 3D Editor. At the end you will have to “apply” your Morph shapes (bake the shapes into your meshes) but knowing about how to use Morph shapes is still a very convenient technique. Here is how you can make use of Morph shapes in Blender:
Note: The values are percentages (in the range of [0.0 – 1.0]) You can edit these values directly, or you can click drag them with the mouse or you can modify them with the slider that appears below the list. and the eye icon allows you to enable/disable a shape key.
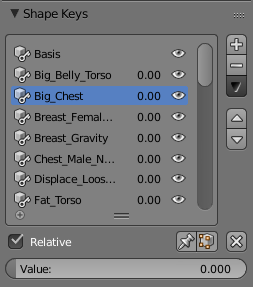
The very first shape key that you create will always be treated as the Base mesh. By default Blender gives it the name Basis However you can change the name if you like.
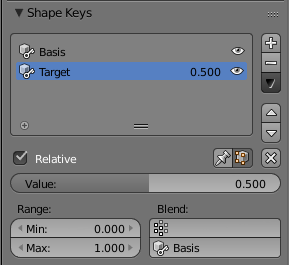
Now you can add Morph Targets one by one (use the plus sign at the top right corner of the shape Keys panel). By default the keys are named Key 1, Key 2, Key 3, … and again you are free to rename the keys to your likes. In the example above i have just added one Shape key and named it Target.
Below the shape Key list you find a slider. This is where you define the morph percentage for the Shape key. Up till now your Morph Target and your Basis mesh are the same. Hence changing the value slider does not do anything at the moment.
Defining a Morph Target is simple and straight forward. what you do is this:
- In the Shape keys panel select the Shape key for which you want to define a morph Target
- Go to edit mode
- Shape your mesh as desired. But beware: do never remove or add vertices. There is a high risk that you will instantly break your entire mesh!
- Step back to object mode and move the Shape key slider and see how your mesh morphs.
Hint: When you enable the Apply Shape keys in Edit Mode Button (see the little cube icon that i enabled in the image above…) , then you can test your mesh directly in Edit mode.
Pitfalls when you work with Morph
When you have Morph sliders enabled then sometimes you may encounter a strange behavior of your mesh:
Vertex won’t move
When you try to move a vertex it just won’t do that and stay where it is. The reason for this behavior is: You have enabled a Morph key (maybe even to 100 %) and you have enabled morphs in Edit Mode. But you have not selected the currently active Morph in the Shape Keys list.
Edits disappear when leaving Edit Mode
You can edit your vertex locations, but as soon as you leave edit mode, you see the base mesh (or the current shape key) The reason for this behavior is: You have enabled a Morph key (maybe even to 100 %) and you have disabled morphs in Edit Mode. You have not selected the currently active Morph in the Shape Keys list. So you see something different in Object mode and in edit mode.
Skeletal Animation (Outlook for the next Lesson)
As we have seen before some of the Shape sliders change the bone length of the skeleton bones. Those changes of the skeleton are also propagated to the Avatar mesh. This method for shaping the mesh is named skinning. It uses weight maps with weights for each bone and for each vertex of the mesh. In the next lesson we will get a much deeper understanding about what happens under the hood.