In Object Mode: Object -> Sculptify
This function takes your object, analyzes its mesh and creates the UV-map.
Of course this script can only create good results if the mesh is already compliant to the rules of sculpted prims:
- The mesh must be unwrapable to a single flat and rectangular surface with no holes or cuts in it.
- Only Quads are allowed (faces with exactly 4 vertices)
Where Sculptify works out of the box
Sculptify only works correctly if the mesh has got a mesh topology which is exactly conform to the constraints of Sculpted Prims as defined above. So when you sculptify a sculptie, then Sculptify will almost ever work properly. But be aware: Especially tortured Sculpties as they are made for fractional sculpting do normally not work very well with Sculptify.
Where Sculptify fails out of the box
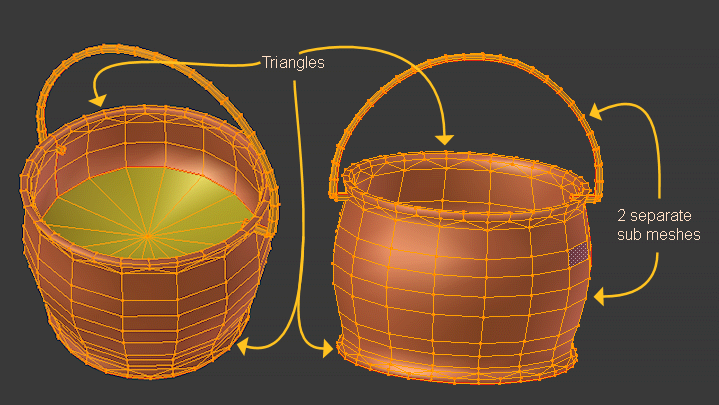
This is an example where Sculptify will get a lot of trouble. The object consists of several submeshes (2 here). And it contains a bunch of triangles (around the edges). While Sculptify will try its best to get submeshes merged into one Sculpted prim, it will completely fail on the Triangles. Indeed it will even complain before trying. You will end up with a popup telling you, that triangles are not supported in Sculpted Prims.
So we have to prepare this object. Although it is possible to convert this object into a single Sculpted Prim, we will make it simple and separate the submeshes first into 2 separate objects (select one submesh in edit mode and then press “p” and choose “selection”).
Lets us turn to the kettle and now.
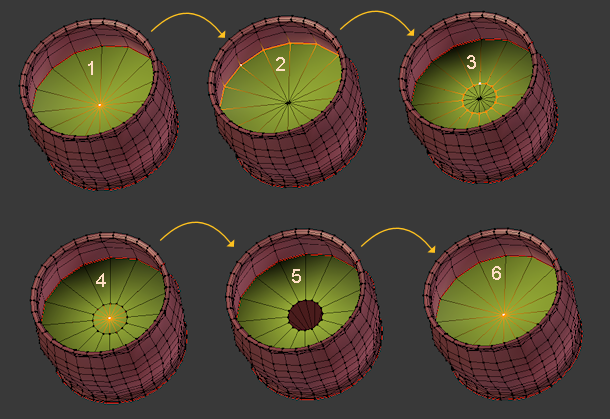
First we will look at the “poles”. Indeed these are no poles, but single vertices. Sculpted Prims must use poles here instead. So we will have to add them manually as follows:
- This is one single vertex. We want to replace it by a pole (made of 16 collapsed vertices).
- Select the next edge loop around the “pole”, then extrude the edge loop but do not move it:
“e” directly followed by right mouse click - Scale the new edge lop down a bit so that you can see the new Quads we have just created by extruding.
- Select the middle vertex and delete it.
- Select the edge of the hole
- and collapse it by scaling it to 0 (zero).
Now we have replaced the single vertex by a pole made of 16 collapsed vertices. Note that each adjacent polygon still looks like a triangle, but now it is really a Quad with 1 collapsed edge!
We have to do exactly the same operation also on the bottom of the kettle where we will find another single vertex which needs to be replaced by a pole.
Now let us get rid of the remaining triangles:
Now we have to turn to the seams. We have to distinguish 2 situations here:
- If your object was originally a Sculptie, then keep the seams as they are.
- If your object was NOT a sculptie (as our kettle was definitively not a Sculpted prim), then remove all seams from the object now!
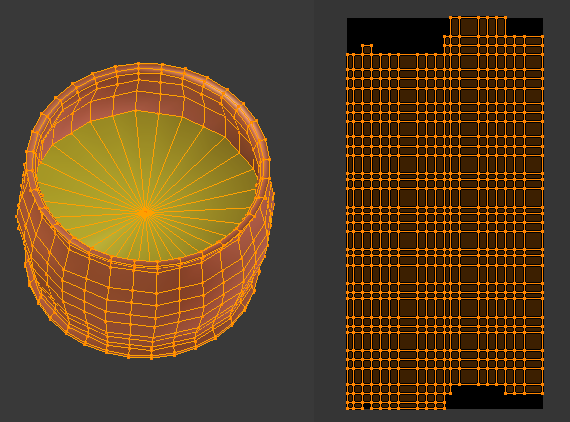
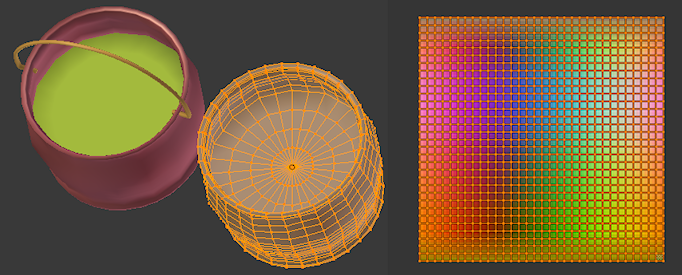
Now go to object mode and then Object -> Sculptify And this is the resulting UV-map:
This is not good. The UV-map looks a bit broken. But at least it is almost rectangular. What happens here ? Well, indeed the Sculptify tool has tried to make a special UV-unwrap (follow active Quad) But the tool did not exactly align the start points of all columns of faces. And also the entire map seems to be rotated by 90 degrees. You can see that when you select one horizontal row on the UV-map and see that it matches to one vertical row on the mesh.
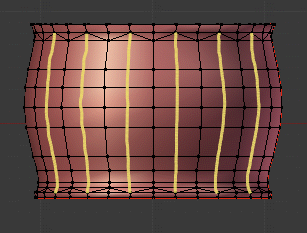
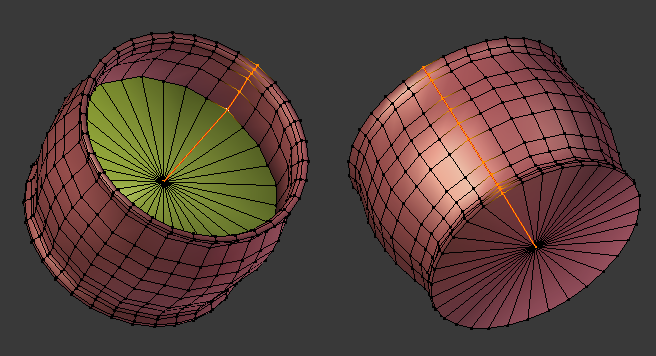
Fortunately we can force the tool to line up the columns as we want. We only need to add one vertical seam as a hint for the Sculptify tool:
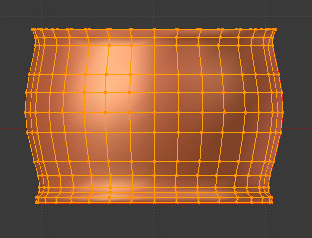
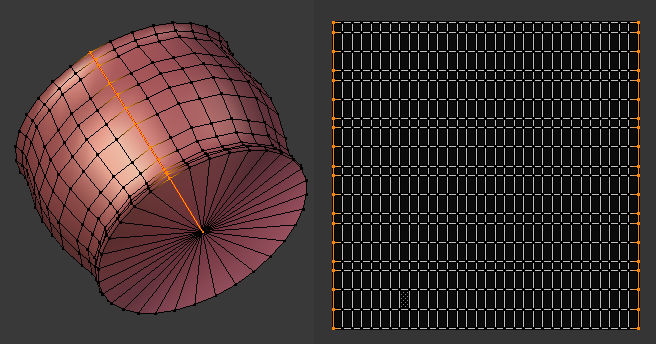
Now finally this Object starts looking very familiar to you, does it ? Let us Sculptify again and now see this result:
This looks very promising. Also the rotation of the UV map has disappeared! The UV-map still does not look 100 percent uniform, but this is indeed not necessary. The Sculptie baker can handle this!
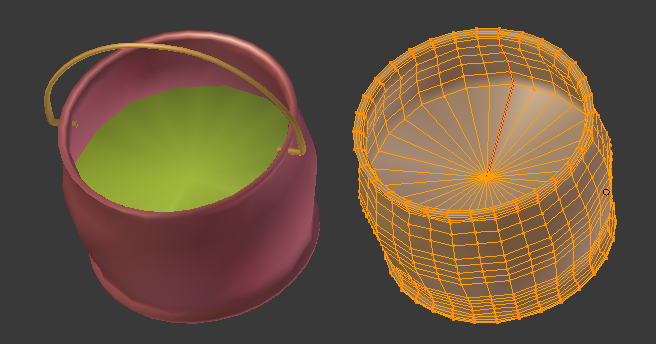
So we are curious and we will verify now if we really got a Sculpted Kettle. Let us bake the object and examine the resulting Object:
So this was almost a success. Please note that the result is not very good regarding LOD stability. You will have to add a few edge loops especially around the poles. Otherwise your object will collapse already on LOD2. Please add the edge loops on the original object on the left side, then do another Sculptify. that is the correct way to get the edge loops where you want them to be! Here is the final LOD-optimized result after adding some edge loops and doing another sculptify (See that now the UV-map is very even and contains 32 times 32 square faces):
Now as an exercise it is your turn to sculptify the handle.
Sculptify to fix the UV-map
We already have seen in the previous chapter, that this function is not only useful to create the UV-map for non sculptie objects, but it can also be used to update the UV-map after adding some edge loops. But there is yet another usage scenario: Assume you have modified the mesh in a way which affects the UV-map itself. This often happen when you add or remove an edge lop near the poles. Then your UV map seems to contain some triangles where it should only contain quads. Or even more apparent, when you have added or removed edge loops the ratio of faces along U and V might have changed. In such case you can call the sculptify function and get an updated/fixed UV-map.
Hint for Primstar-1 users: You had to remove the “sculptie” map prior to re-sculptify a sculptie. This is no longer necessary. In Primstar-2 sculptify will create a sculptie UV-map if there is none, or it will update an existing sculptie UV-map if it finds one for the selected object.
