Nginx Site configuration
We will provide one main folder for each WordPress installation. So we can trreat each installation separately. We choose our main directories to be located in the root folder /srv
For the begin we create a site directory for www.machinimatrix.org and add the basic subfolders:
cd /
sudo mkdir www.machinimatrix.org
sudo chown gaia:gaia www.machinimatrix.org
cd www.machinimatrix.org
mkdir logs www
Note about the subfolders:
- logs: WordPress logs
- www: WordPress installation
With the directory structure in place it’s time to create the server block in Nginx. Navigate to the sites-available directory:
cd /etc/nginx/sites-available
Create a new file to hold the configuration. Naming this the same as the site’s root directory will make server management much easier when hosting a large number of sites:
sudo vi www.machinimatrix.org
Copy and paste the following configuration, ensuring that you change the server_name, access_log, error_log and root directives to match your domain and file paths. Hit CTRL X followed by Y to save the changes.
server {
    listen 80;
    listen [::]:80;

    server_name machinimatrix.org www.machinimatrix.org;

    access_log /srv/www.machinimatrix.org/logs/access.log;
    error_log /srv/www.machinimatrix.org/logs/error.log;

    root /srv/www.machinimatrix.org/www/;
    index index.php;

    location / {
        try_files $uri $uri/ /index.php?$args;
    }

    location ~ \.php$ {
        try_files $uri =404;
        fastcgi_split_path_info ^(.+\.php)(/.+)$;
        fastcgi_pass unix:/run/php/php7.0-fpm.sock;
        fastcgi_index index.php;
        include fastcgi_params;
    }
}
This is a bare-bones server block that informs Nginx to serve the machinimatrix domain and www subdomain. It also sets the directory that Nginx should use for the site root and where to store the server log files. The two location blocks essentially tell Nginx to pass any PHP files to PHP-FPM for interpreting.
By default Nginx won’t load this configuration file. If you take a look at the nginx.conf file you created further up in this document, then you will see the following lines:
##
# Virtual Host Configs
##

include /etc/nginx/conf.d/*.conf;
include /etc/nginx/sites-enabled/*;
Only files within the sites-enabled directory are automatically loaded. This allows you to easily enable or disable sites by simply adding or removing a symlink.
To enable the newly created site, symlink the file that you just created into the enabled-sites directory:
cd /etc/nginx/sites-enabled
sudo ln -s ../sites-available/www.machinimatrix.org .
In order for the changes to take effect, you must restart Nginx. However, before doing so you should check the configuration for any errors:
sudo nginx -t
If the test failed, recheck the syntax of the new configuration file. If the test passes, restart Nginx:
sudo service nginx restart
With Nginx configured to serve the new site, it’s time to create a new database for the WordPress installation.
Creating a Database
When hosting multiple sites on a single server, it’s good practice to create a separate user and database for each individual site. You should also lock down the user privileges so that the user only has access to the databases that they require. Here’s how to do just that.
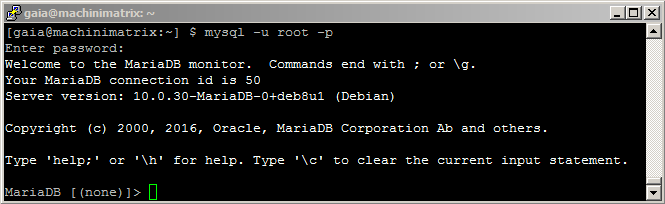
Log into MariaDB with the root user. Although we’re using MariaDB the commands are exactly the same as if using MySQL, because it’s a drop in replacement. MariaDB and MySQL will be used interchangeably throughout the remainder of this post.
mysql -u root -p
You’ll be prompted to enter the password which you created when setting up MariaDB.
Once logged in, create the new database:
CREATE DATABASE www_machinimatrix_org CHARACTER SET utf8mb4 COLLATE utf8mb4_unicode_520_ci;
Next, create the new user using the following command, remembering to substitute the username and password for your own values:
CREATE USER 'username'@'localhost' IDENTIFIED BY 'xxxxxxxx';
You then need to add the required privileges. To keep things simple, you can grant all privileges but restrict them to the www_machinimatrix_org database only, like so:
GRANT ALL PRIVILEGES ON www_machinimatrix_org.* TO 'username'@'localhost'; Alternatively, you can have more granular control and explicitly define the privileges the user should have:
GRANT SELECT, INSERT, UPDATE, DELETE ON www_machinimatrix_org.* TO 'username'@'localhost';
Be very careful as not to overly restrict permissions. Some plugins and major WordPress updates require heightened MySQL privileges (CREATE, DROP, ALTER, etc), therefore revoking them could have adverse effects. The WordPress Codex has more information on the subject, which can be found here.
For the changes to take effect you must flush the MySQL privileges table:
FLUSH PRIVILEGES;
Finally, you can exit MySQL:
exit;
Now that you have Nginx configured and a new database table, it’s time to install WordPress, but before doing so you’ll need to install WP-CLI.
Installing WP-CLI
If you have never used WP-CLI before, it’s a command line tool for managing WordPress installations, and greatly simplifies the process of downloading and installing WordPress (plus many other tasks).
Navigate to your home directory:
cd ~/
Using cURL, download WP-CLI:
curl -O https://raw.githubusercontent.com/wp-cli/builds/gh-pages/phar/wp-cli.phar
You can then check that it works be issuing:
php wp-cli.phar --info
The command should output information about your current PHP version and a few other details.
In order to access the command line tool by simply typing wp you need to move it into your PATH and ensure that it has execute permissions:
chmod +x wp-cli.phar
sudo mv wp-cli.phar /usr/local/bin/wp
You can now access the WP-CLI tool by typing wp.
Installing WordPress
With everything in place it’s time to install WordPress. Start by navigating to the site’s public directory:
cd /srv/www.machinimatrix.org/www
Then using WP-CLI, download the latest stable version of WordPress into the working directory:
wp core download
You now need to create a wp-config.php file. Luckily, WP-CLI has you covered. Please replace dbname, username and password in the following commandline by your own values:
wp core config --dbname=www_machinimatrix_org --dbuser=username --dbpass=password Finally, with the wp-config.php file in place, you can install WordPress and setup the admin user in one fell swoop:
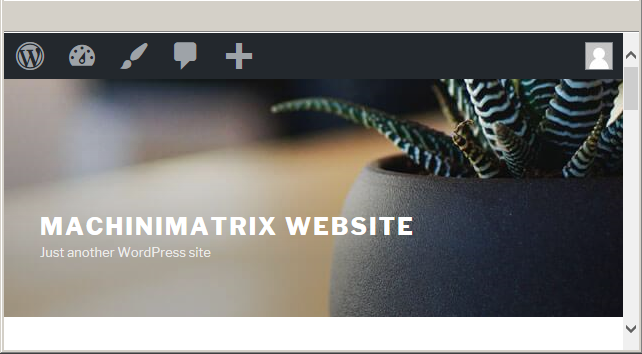
wp core install --url=http://www.machinimatrix.org --title='Machinimatrix Website' --admin_user=username --admin_email=username@www.machinimatrix.org --admin_password=password On success, you should be able to visit the domain name within the browser and be presented with a blank WordPress installation:
Adding Additional Sites
Additional sites can be added to your server using the same procedure as above and you should be able to fire up new sites within a couple of minutes. Here’s a quick breakdown of how I personally add them:
- Add the relevant DNS records to the domain.
- Navigate to /srv and create the required directory structure for the new site (logs and public).
- Navigate to the
sites-availabledirectory within Nginx and copy an existing config file for the new server block. Ensure you change the relevant directives. - Symlink the config file to the
sites-enableddirectory to enable the site and restart Nginx. - Create a new database and MariaDB user as described above in the MariaDB section.
- Navigate to the site’s public directory and download, configure and install WordPress using WP-CLI.
It’s as simple as that.
You are free to add as many additional sites to your server as you like, the only limiting factors are available system resources (CPU, RAM, etc) and bandwidth restrictions imposed by your VPS provider. Both of which can be overcome by upgrading your package. Caching will also greatly reduce system resource usage, which is something I will guide you through in the next post.