Intended Audience
This guide is intended for users who want to build Blender from its sources on Windows. I assume you have a rough understanding how programming works in general, but you do not yet need to have detailed knowledge about the topic.
List of installed Software
- Visual Studio Community 2013 (Microsoft)
- msysgit
- tortoiseSVN
- CUDA Toolkit (nvidia)
- Cmake
- OpenCollada(optional)
Preparations
- Ensure you have a connection to the internet.
Note: All my download times are based on a 3 mbit connection. So your times might vary. - Be prepared to download a few Gigabytes. Here are the biggest parts:
- Blender Sources: ~400 MByte
- Blender runtime libraries: ~6.5 GByte
- Visual Studio: ~2 GByte
- CUDA Toolkit: ~1 GByte (optional)
- Ensure that you have about 20 Gigabytes of free space on your computer disks
- You need an Administrator Account on your computer1. And i believe it is very useful to login as Administrator when you are installing the tools. Otherwise Windows tends to install the software at weird places (at least at places where the build environment never looks at)
1: If you prefer to setup everything with a normal user account, then please be prepared that occasionally an installer will prompt you for the Administrator password.
Step 1: Install the Compiler (~3 hours)
Quickinfo: Download and install Visual Studio Community 2013
Detailed Installation instructions…

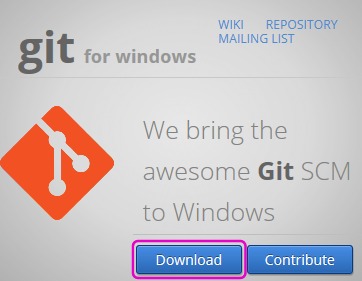
Click on the Download button and download the file: vs_comunity.exe (~1 mbyte ) It is best to save the downloaded file at a safe place. Thus you already have it at hand should you ever need it again.
- Execute vs_community.exe
- Agree to the License Terms
- Next …

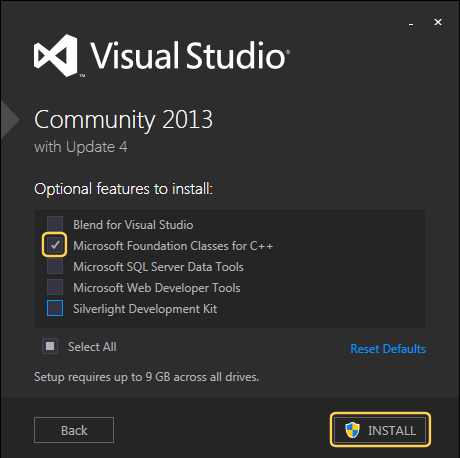
- Ensure you have enabled
Microsoft Foundation Classes for C++ - You can disable all the rest (or select All, as you prefer)
- Install …
- If you are not an Administrator, then you now will be asked to provide an Administrator Password.
Now your computer gets busy for quiet a while. It fetches a whole lot from the internet. For me it took ages (about 2 hours on a 3 mbit connection)
There you get the option to “Sign In” or skip that for later. I decided to not sign in for now.

Now just check if the Visual C++ environment starts as expected. So, select Visual C++ and then Start Visual Studio and again wait a few minutes…:
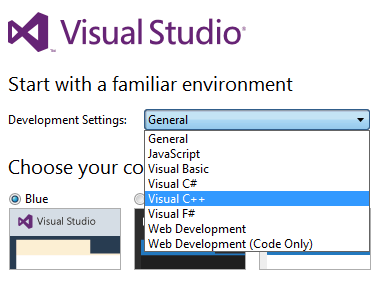
You should end up in the Visual Studio welcome Screen. Now all is well for that part. Lets keep Visual Studio aside for a while (File -> Exit).
Besides installing the IDE (Integrated development Environment) we will need to get hold on the Blender sources. So lets step to the next task, that is:
Step 2: Install GIT (~5 minutes)
Quickinfo: Download and install msysgit from github.io (You can use the default installation)
Detailed Installation instructions…
- Download msysgit from github.io. Save the downloaded file at a safe place for later reuse (should you need to install again).
- Then run the downloaded installer and just accept all defaults (click the Next button repeatedly,
- and finally click the Finish Button.
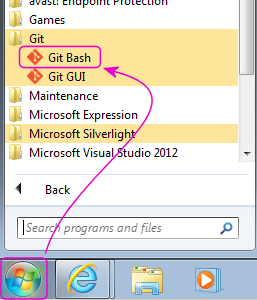
If all worked nicely, then you can check that git is installed by clicking Windows start and navigate to the Git Program. I will use Git Bash for getting Blender. So lets click on the Git Bash icon to verify that it works. This will open up a Command line shell. keep the shell aside for a moment, we will use it soon.
Note: You might prefer to use Git Gui, but then it is your duty to learn how to use it.
Sidestep: Prepare the Disk space
Before we can actually get the Blender sources, we need to find a location where we put them. Please choose a location on your computer that is convenient for you.
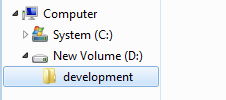
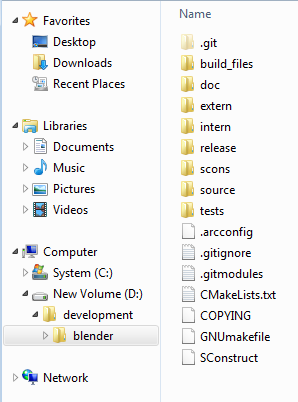
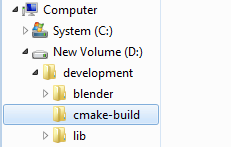
My Computer has 2 Disks and i have decided to put all my blender work into a development folder on disk D: and i will use this folder for the rest of this tutorial.
So, now we are ready to
Step 3: Fetch the Blender Sources (~1 hour)
Quickinfo: You can get the Sources from The Blender repository using:
git clone git://git.blender.org/blender.git
As i assume you have never yet cloned a git repository, here are the detailed instructions:
Fetch Blender sources by using git…
developer@mycomputer /c
$ cd d:/development
Note: The following is a very brief run through using git to fetch the blender sources. You may want to read the much more detailed article about using git for blender in the Blender wiki.
developer@mycomputer /d/development
$ git clone git://git.blender.org/blender.git
$ cd blender
$ git submodule update --init --recursive
$ git submodule foreach --recursive
$ git checkout master
$ git submodule foreach --recursive
$ git pull --rebase origin master
The follow up lines fetch subrepositories (like the Addon folder, and the internationalisation folder)
Once you have fetched the repository, then you can update it to the newest version at any time:
developer@VWIN7001 /d/development
git pull --rebase
git submodule foreach --recursive git pull --rebase origin master
So, by now we have fetched blender’s sources. Now we need to get a few prepared runtime libraries (dll’s). And these libraries need a subversion client…
If your system is not prepared for development thatn you most probably will not see file appedices. this is why you might find a couple of files which apparently have no name (see image)
You should configure your File browser for development…

How to Configure your File Browser for Development
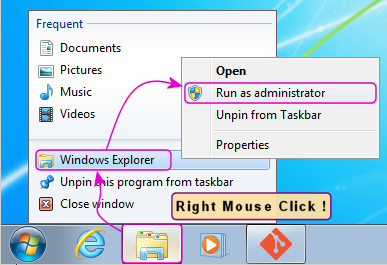
If you are not using the Administrator account, then you need to open your file browser in Administrator mode:
- RMB1 the File Browser icon
- RMB Windows Explorer
- RMB Run as Administrator
1: RMB := Right Mouse Button
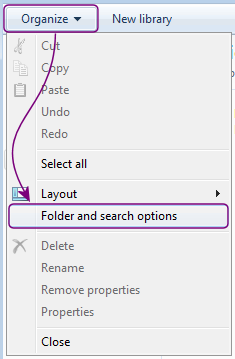
- Open the Organize panel
- Select Folder and search options
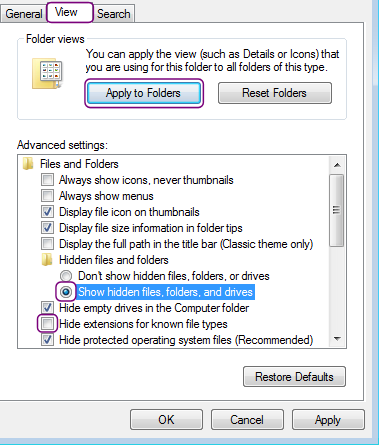
- Open the View Panel
- Eenable Show Hidden files…
- Disable Hide extensions…
- Then Apply to Folders
Step 4: Install a Subversion Client (~5 minutes)
On Windows Blender provides a set of ready compiled Runtime Libraries. Those libraries are hosted on a subversion server (subversion is yet another revision management system). So we need to install a Subversion Client.
Quickinfo: I propose to use TortoiseSVn as the Subversion Client
Details about installing TortoiseSVN
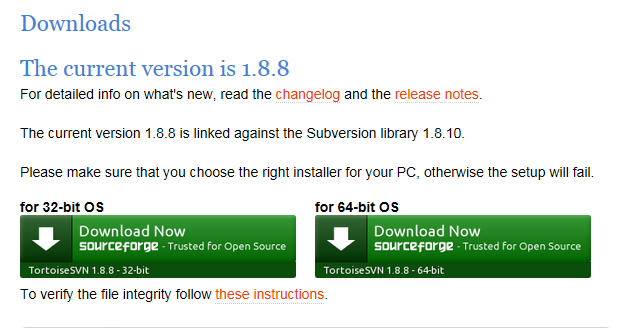
Hint: When you click on the Download button, thenyou get greated by a totally confusing page. I tried to spot where to click next for a while. Until i realised that the download started automatically.
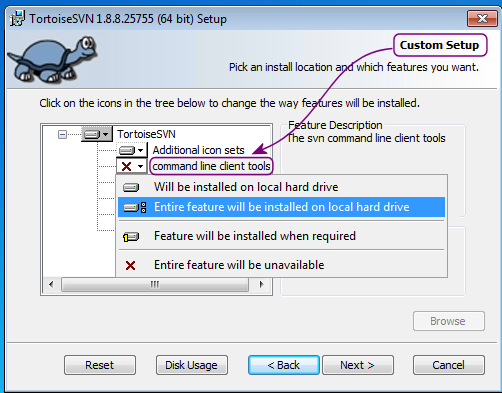
Once it is downloaded, just run the installer. You can use the default settings:
- start the installer
- Accept the license
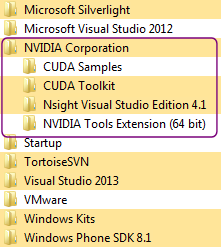
Now step ahead until the Installer is finished. and if all went well, you now find TortoiseSVN in your program folder (see image)
Hint: If you do not run as Administrator, then you will be asked during the installation to login as Administrator.
Caveat: Should you still have your Git Bash window open (from Step 2-3 above), then please close it now and open a new one. Otherwise you will not see the Subversion tools in the Git Bash window!
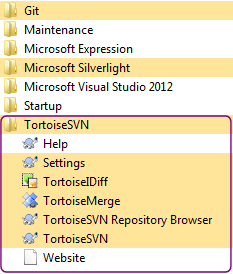
TortoiseSVN tools in your Program folder
For the curious: Why does blender use subversion and git in parallel?
You might ask yourself why Blender does not use git also for the libraries. There is a good reason for doing this! That is: git always creates a clone of the entire repository on your local computer. If you would do this for the runtime libraries then you would get hundreds of gigabytes of “historical” runtime libraries. Subversion is much better suited for hosting binaries, because you actually get only the newest version of all files which is exactly what we want here.
Step 5: Fetch the Blender Runtime Libraries (~3 hours)
developer@mycomputer /c
$ cd d:/development
$ mkdir lib
$# you can check that all is well by listing the directory:
$ ls blender lib
Now you need to know if you are building for a 64 bit operating system or on a 32 bit operating system Depending on this you will need to fetch different libraries (again, be patient, you will fetch several hundreds of Megabytes and it might take a couple of hours to fetch these libraries):
For 64 Bit builds you will use this command (attention, you will move 6.5 GByte over the net):
developer@mycomputer /d/development/lib
$ baselink=https://svn.blender.org/svnroot/bf-blender/trunk/lib
$ svn checkout $baselink/win64_vc12 lib/win64_vc12
For 32 Bit builds you will use this command:
developer@mycomputer /d/development/lib
$ baselink=https://svn.blender.org/svnroot/bf-blender/trunk/lib
$ svn checkout $baselink/windows_vc12 lib/windows_vc12
If you are planning to build for both build types, then you are free to checkout both library sets. However, please take care to use exactly the statements as given above. You might otherwise run into weird issues later (the compiler won’t find the libraries)
Step 6: Install the CUDA SDK (Optional, ~3 hours)
You need to install the CUDA development kit only if you plan to build Blender with CUDA support. Please note that building with CUDA slows down the Blender build a lot. I warned you. Here is how you install it.
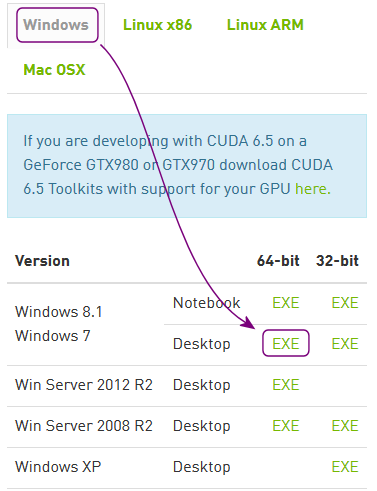
Quickinfo: You get the CUDA Toolkit from NVIDIA CUDA Download page
Detailed Installation instructions…
When you install the toolkit and when you are not running as Administrator, then you will get asked for the Administrator password.
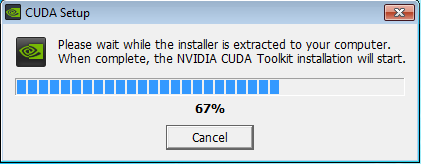
You will also be asked where to extract the installation package. You can change this to your likes (i kept with the default).
- Agree to the License terms
- Use the Default settings
Now the Installer takes about 5 minutes to install the toolkit.
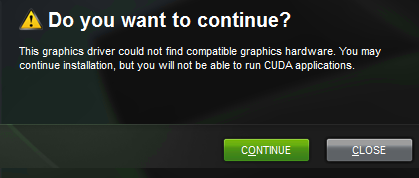
At the end of the installation you might get a warning about not all NSight features are enabled. You can ignore this message and click on Next.
And then Close the installer
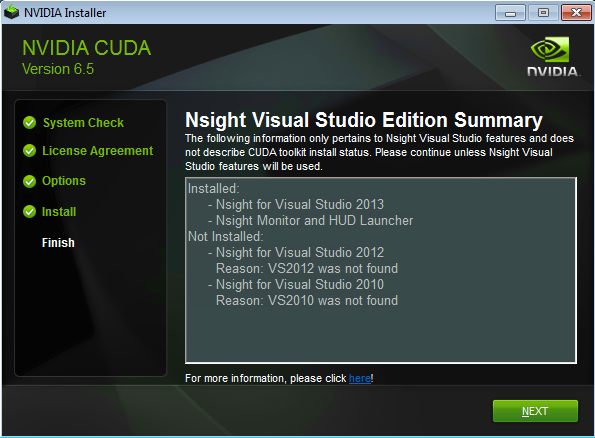
we are now done with the Toolkit installation.
By now we have installed most of the necessary software and we have fetched all sources and runtime libraries. However there is one more task to be done. That is, Blender can be built on many platforms using many different compilers. Hence the sources are not prepared for a particular environment. This will be done with the CMake tool. So lets step ahead and…
Step 7: Install CMake (~5 minutes)
Quickinfo: You get CMake from cmake.org Navigate down to the bottom of the page. There you find the download button for the latest stable release.
Detailed Installation instructions…
- Open the CMake homepage at cmake.org
- Navigate to the bottom of the page
- And download the latest stable release

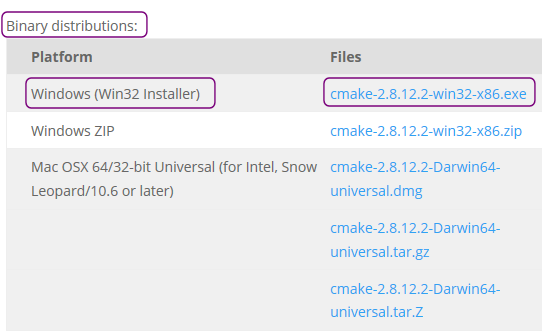
- On the download page navigate down to the Binary distributions
- Select the Win32 Installer
- When you install the Software and when you are not logged in as Administrator you will be asked for the Administrator password.
- Agree the License Terms
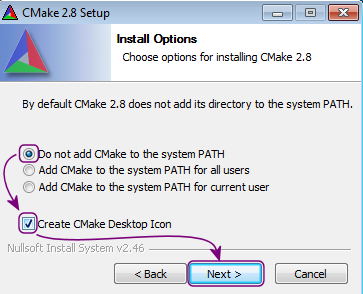
- In the Install Options you may want to select that you want a Desktop Icon
- I kept the other setting as proposed by default.
- Hit Next for a couple of times
- And Finish the Installation at the end
Now you should have a CMake Icon on your desktop.
Step 8: Generate the Make Environment (~5 minutes)
Quickinfo: Configure to use the defaults.
Detailed Installation instructions…
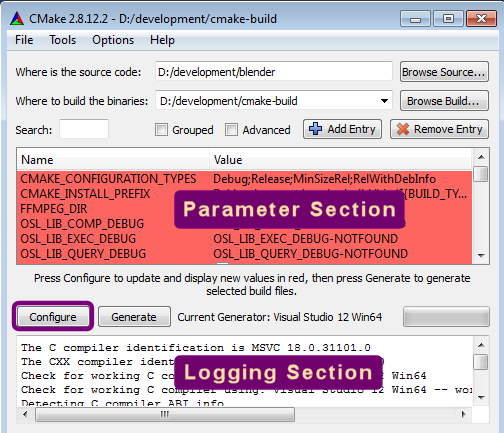
- open CMake
- The source is in the blender folder that you fetched with git
- Please specify a separate folder for where to build the binaries. Cmake will create this folder for you if it does not yet exist. In this tutorial i use the folder name cmake-build
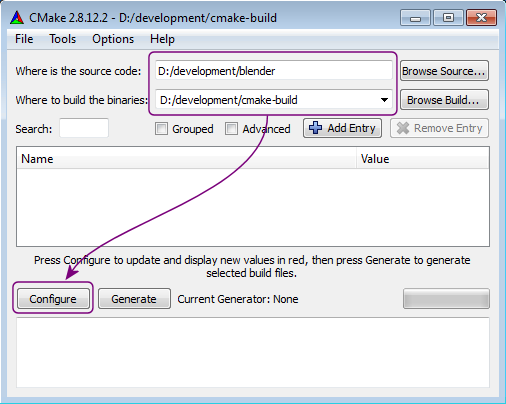
- Click the Configure Button
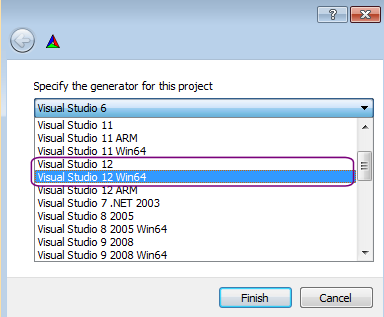
- From the list of IDE’s select
- For 32 Bit builds select Visual 12
- For 64 Bit Builds select Visual Studio 12 Win64
- Select Use default native Compilers
- Click Finish
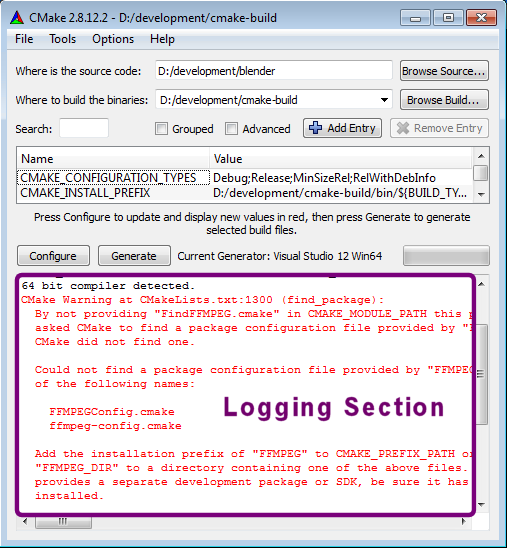
However this is not an indication of an error, but actually a cool feature. You will understand its benefits after working with CMake for a while. For now all you need to do is to Configure a second time. And now CMake does not detect any new parameters, thus after the second Configure all parameters are now displayed with white background.
- Now in the final step you will Generate the Build environment. Note: The Generate button is right to the Configure button.
- And as soon as the Generate is done, then your Build directory is prepared for the final step, that is we will now build Blender.
So, in the final step we will
Step 9: Build (~20 minutes)
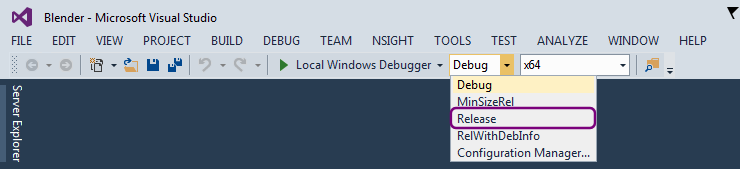
Quickinfo: Open cmake-build/Blender.sln and build Release and/or Debug
Detailed Build instructions…
- Open the Visual Studio Software
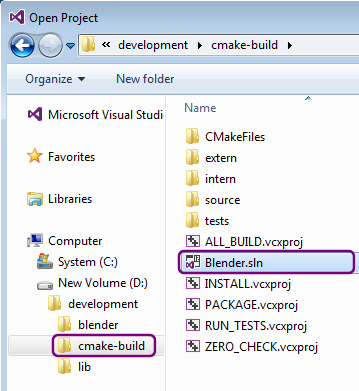
- File -> Open ->Project/Solution
- navigate to your cmake-build folder
- Select the file Blender.sln
- And Open it
Now the Compiler will take a moment to initialise the project and parse all the sources. Just give it a couple of minutes to prepare. Tip: While the program is working it displays messages in the window footer.
Once you have prepared everything as described up til here, you finally can begin the build:
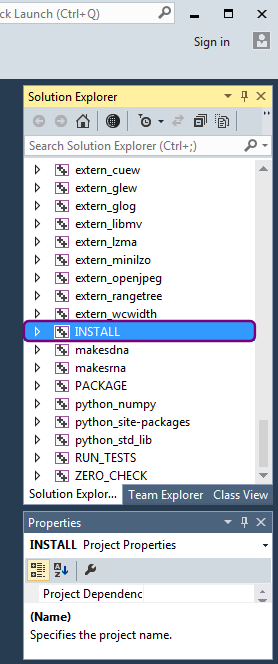
- Navigate to the Solution explorer (on the right side of the Visual Studio screen)
- Scroll down to the Bottom in the explorer window.
- There you find the INSTALL Target.
- Right click -> Build
- A new Output Window should pop up. There you can follow what the build process is doing. If any errors show up they will be displayed here.
Note: The INSTALL target will compile Blender and finally install the ready made Blender into your cmake-build folder (see below).
Hint: The build can take a long time depending on how fast your computer is. On my computer a full build takes about 10 minutes. The final lines in the Output Window:

Please ensure that you see the message 0 failed in the middle of the last line. If you see 1 or more failed tasks, then you need to investigate.
Step 10: Test the build
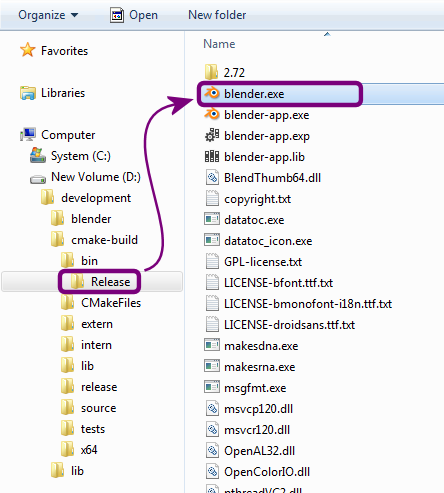
Now is time to try if your just built Blender also works for you. You find the program in your cmake-build folder. Navigate to:
cmake-build -> bin -> Release
Double click on the blender.exe and be happy.Some useful links for when things go wrong:
- official blender build documentation
- #blendercoders (irc channel on freenode.net)
- developer.blender.org (tasks&bugs)
Keeping up to date
Once you have set up your Blender build environment, you probably want to keep up to date with the ongoing work. So you might want to refresh the sources occasionally. Luckily this is very easy and most important you do not need to fetch everything over and over again. Git is clever enough to only fetch what has changed since the last update.
Update the blender sources (git)
developer@mycomputer /c
$ cd d:/development/blender
developer@mycomputer /d/development/blender
$ git pull --rebase
$ git submodule foreach --recursive
$ git pull --rebase origin master
Hint: The git repository is updated frequently. It is common to see many updates per day. But you won’t miss anything, just update at any time you like and you get all updates up to the newest one.
Tip: In many cases it is sufficient call only: git pull –rebase Often you do not need to update the submodules. However updating all at once is probably the cleanest workflow.
Update the blender libraries (subversion)
For 32 Bit builds you will use this command sequence:
developer@mycomputer /c
$ cd d:/development/lib/windows_vc12
developer@mycomputer /d/development/blender
$ svn update
For 64 Bit builds you will use this command sequence:
developer@mycomputer /c
$ cd d:/development/lib/win64_vc12
developer@mycomputer /d/development/blender
$ svn update
Hint: Runtime libraries are only updated once in a while (maybe 4 times per year). Hence in most cases the subversion update doesn’t update anything.
Building OpenCollada (optional)
You really do not need to build openCollada. The collada libraries are distributed as part of the subversion runtime libraries (see above). However some may want to test most recent builds of openCollada. Here is what you need to do in that case:
I assume that you have already installed Visual Studio 2013 (comunity edition), git and cmake (as described further up in this document). Then you can proceed as follows:
- Grab the OpenCollada sources from OpenCollada on Github: Use a command line shell and type in:
git clone https://github.com/KhronosGroup/OpenCOLLADA.git
- open the cmake tool and ensure you have following attributes set :
CMAKE_INSTALL_PREFIX(1) CMAKE_DEBUG_POSTFIX CMAKE_CXX_FLAGS_DEBUG CMAKE_CXX_FLAGS_RELEASE CMAKE_CXX_FLAGS_RELWITHDEBINFO CMAKE_CXX_FLAGS_MINSIZEREL CMAKE_C_FLAGS_DEBUG CMAKE_C_FLAGS_RELEASE CMAKE_C_FLAGS_RELWITHDEBINFO CMAKE_C_FLAGS_MINSIZERELD:/lib/win64_vc12/opencollada(2) _d /D_DEBUG /MTd /Zi /Ob0 /Od /RTC1 /MT /O2 /Ob2 /D NDEBUG /MT /Zi /O2 /Ob1 /D NDEBUG /MT /O1 /Ob1 /D NDEBUG /D_DEBUG /MTd /Zi /Ob0 /Od /RTC1 /MT /O2 /Ob2 /D NDEBUG /MT /Zi /O2 /Ob1 /D NDEBUG /MT /O1 /Ob1 /D NDEBUG1: Platform maintainers: You can generate directly into the subversion folders, the generated files should be ready for checking in without any manual changes.
2: You must use ‘/’ as path separator here (even when you are on Windows!) otherwise the build will fail.
- Now configure and generate your CMAKE project. Take care to configure to the correct visual studio version
- locate the opencollada.sln file in the generated build folder anddouble click on it
- now select Debug or Release type (in the middleof the top menu bar)
- then build the INSTALL target
Important: You might see an error related to building the Framework Validator when you build the Debug libraries:
Error    211    error LNK1104:
cannot open file 'OpenCOLLADASaxFrameworkLoader.lib'
D:\blender\opencollada\cmake-build\COLLADAValidator\LINK
You can ignore this error unless you want to create the Validator as well. In that case please help us to fix this issue. Otherwise you can check that the fresh set of libraries has been created by looking at your Installation Folder (See definition of CMAKE_INSTALL_PREFIX above)
Common Pitfalls
This part i can not create without your help. So please be so kind and report your failures (you can add a comment below). And if you found a fix, then please add it as well. I will then edit this document. Thanks.
I have separated this collection into 2 parts:
- Setup issues: what can go wrong while you try to get your first successful build
- Sudden breakage: What can go wrong in follow up builds
I make this separation because the first category of errors is typically due to wrong setup tools, while the second category is mostly about changes in the infrastructure and related requirements for building blender. Or simply changes in the sources them self.
Setup issues
No issue known at this time.
Sudden breakage
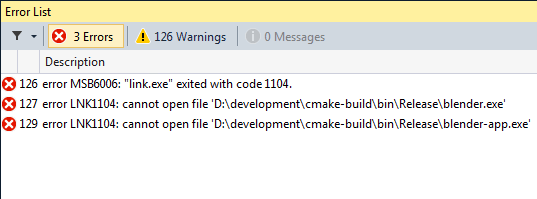
Yesterday it worked, today its broken…
probable cause: You have blender still running
probable fix: Close blender and try again
Build breaks after updating the sources
Someone told you that there is something new in blender and you are eager to get the new feature directly. So you updated your source repository, then in Visual studio you Selected INSTALL -> Build as you did before. But now it fails.
probable cause: The developers broke something. This can happen during development and there is nothing wrong with it. It just happens!
probable fix: Please do not complain but help to fix if you can. Ask in the blender IRC if this problem is known. Try to find the responsible developer. Create a bug report…