Export your Character as Collada
Hint: You usually can keep the default settings and just click on the “Collada(Avastar)(.dae)” button. A File Selector will pop up. Here you can navigate to your export directory and then export your file as a Collada file (using the file extension “.dae”)
Modifiers
By default Avastar applies all mesh changing Modifiers except the Armature Modifiers to the exported meshes. However, some modifiers have 2 sets of options, one option set is for rendering, the other option set is for the Viewport. We provide 3 options here:
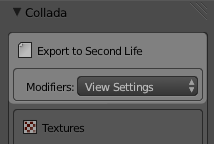
- Apply according to the View Settings (the 3D Preview settings)
- Apply according to the Render Settings (the settings for Blender’s own Renderer)
- Don’t apply modifiers and only export the base mesh
The View settings will be applied by default. These settings are very closely related to the Blender Render System. In most cases you can actually just use the defaults. We will get back to this when we talk about how to use (or not use) Modifiers.
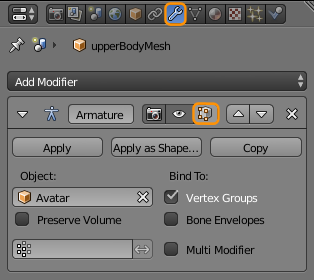
We will get to armature Modifiers in the “Create an Attachment” tutorial.
Hint: You want to display the modifier in edit mode and adjust edit cage to modifier result
Textures export (advanced)
Note: But for rigged meshes the images are not recognized.
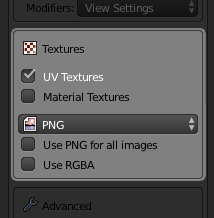
- UV Textures & Material Textures: Blender supports Material based textures and UV textures (which are directly assigned to polygons). Normally you want to export only the UV textures. In rare cases it is more desirable to export the material based textures instead. But beware, Blender does not export the render results, but only the source images!
- Image Type: The image format is typically predefined in the Blender Render settings. However we found it convenient to provide an immediate setting in the Exporter. By default the image type will be applied ONLY to generated images.
- Use ‘Image format’ for all images: If this option is set, then Blender will use the selected image format for all exported images. If the option is disabled, then only the generated images will be affected.
- Use RGBA: Blender can export the Alpha channel for images. Normally this is controlled in the render settings where you can specify to use either RGB or RGBA for image exports. If the currently selected export format supports Alpha then enabling RGBA here will export images with Alpha channel even if the render settings are set to RGB and vice versa.
Hint: You may want to NOT use RGBA because of the Alpha glitch. However this is not a general advice. There are many situations where using Alpha images is even recommended (for example when you want to create an Alpha mask).
Hint: If the format of the exported image(es) does not support an Alpha channel then the “Use RGBA” option is simply ignored.
Advanced options
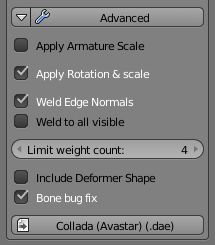
bone bug fix: We have found that some online worlds have serious issues with modified Joint offsets for Collision volumes and Attachments(1). Hence we suppress the export of joint offsets for collision volumes and attachment bones by default.(1): The technical details are related to the SL Importer’s option With Joint Positions The Skeleton can be modified (in edit mode) to create other rest poses than the default rest pose (T-Pose) When you do that, you actually move the Joint Offsets away from their default locations. And you will later have to set “with Joint Offset” during import in order to get your modified skeleton uploaded.