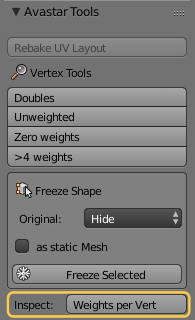
Avastar Tools
The Avastar Tools Panel is sort of a does not fit anywhere else container. You find the Avastar Tool Panel in the Tool Shelf, in the Avastar tab. The panel contains:
- Rebake UV Layout (optimize SL UV Maps)
- Tools to locate vertices
- Freeze Shape panel
- Inspect Weights per Vert (1)
(1): This function is from the Sparkles Addon which is bundled with Avastar-1.1

Rebake UV Layout
Second Life uses an automated Rewrap to improve the Character look after its shape has been modified. Unfortunately this automation does not apply to Custom Mesh characters as well.Avastar’s Rebake UV Layout is a similar function. However the result are not (yet) equal to SL’s bake tools.
Note: The Rebake UV Layout button is only available when the active mesh has a UV Layout.
Vertex Tools
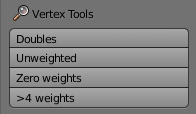
Doubles (Find Duplicates)
Note: this operator does not preserve the original vertex selection. So after the operator is called, only the duplicate vertices are selected or no vertex is selected when the mesh is clean (has no duplicates)
Unweighted (Find Unweighted Vertices)
The Unweighted Operator selects all vertices which are not assigned to any Weight Group.
Note: this operator does not preserve the original vertex selection. So after the operator is called, only the unweighted vertices are selected or no vertex is selected when the mesh is clean (all vertices have weights)
Note: When you have selected multiple Objects you will find a report in the Blender Console with one line per object indicating the number of unweighted vertices.

Zero weights (weigthsum == 0)
The Zero weighted Operator selects all vertices for which the sum of all assigned weights is 0.0 (zero).
Note: this operator does not preserve the original vertex selection. So after the operator is called, only the zero weighted vertices are selected or no vertex is selected when the mesh is clean (all vertices have weightsums > 0)
Note: When you have selected multiple Objects you will find a report in the Blender Console with one line per object indicating the number of vertices with weight sums == 0
>4 Weights (too many Weights on Verts)
The >4 Operator selects all vertices for which the number of assigned weights is > 4.
Note: this operator does not preserve the original vertex selection. So after the operator is called, only the vertices with more than 4 weights are selected or no vertex is selected when the mesh is clean (all vertices have less than 5 weights assigned)Note: When you have selected multiple Objects you will find a report in the Blender Console with one line per object indicating the number of vertices with too many weights.
Freeze Shape
Purpose
The freeze either creates static meshes from your rigged meshes, or modifiable versions of your selected meshes. The tool basically removes all shape keys and all Avastar control data.
The Freeze Tool is used in following situations:
Usage
- Ensure Blender is in Object Mode.
- Select all parts which you want to freeze.
- Set the freeze options.
- Freeze Selected.
Details
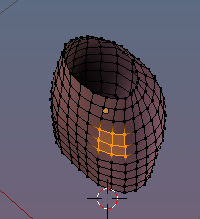
Select all parts of the Avastar meshes which you want to use for your own character:
Here i have selected the Head, the upper body and the lower body
Note: The frozen Meshes do no longer react in the exact same way to the Avastar sliders as the original Avastar character does. However, the meshes behave exactly in the same way as they will behave when imported into SL, OpenSim or other compatible virtual environments.
What you should know
- When you select to Keep the Original, then the original mesh and your frozen mesh will overlap and you might not be able to see that there are actually 2 meshes now.
- When you select to Delete the Original, then the Original Avastar mesh is fully replaced by your frozen version.
- When you select to Hide the original, then the Original Avastar mesh will be hidden from view, then you only see the frozen version.
- when you enable Standalone Posed then your frozen mesh will be detached from the armature and it will end up as a simple non rigged static mesh.
- When you enable Remove Weight Groups then all weight groups of the frozen mesh will be deleted and you end up with a static non rigged mesh without any weights associated to it. (A naked model so to say)
The Tool Options
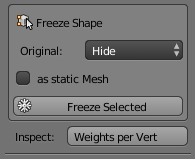
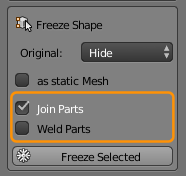
Original:
This option defines what shall happen with the original Mesh(es) (those which you have selected in Object mode)
Values:
- Delete: The Original Mesh is deleted.
- Hide: The Original mesh is kept but gets hidden. You can always unhide hidden objects with the keyboard shortcut ALT + H
- Keep: The Original Mesh is kept and remains visible. Thus the original and the new copy are displayed at the same time
As static Mesh:
If the original Mesh was rigged to an armature, then -by default- the frozen mesh Copies keep rigged as well. But sometimes you want to get a complete static statue with no animation information at all. In this case you will select this option.
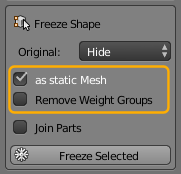
Note: If you select this option you get an additional option Remove Weight Groups which does what the name implies. Hence you can achieve that the frozen object contains no animation data at all (this option is rarely used, but very handy when needed)
Join Parts:
Note: If the Join parts option is selected, then you get one more option Weld Parts. If that option is checked, then all duplicate vertices along the adjacent edges of the joined parts will be merged.
Inspect Weights
The Inspect Weights tool creates a map for quickly spotting areas of Vertices with a high number of weights (number of influencing bones). You find this tool at the bottom of the Avastar Tools panel.
Usually it is fully sufficient to have one or 2 weights per vertex. Only in very rare cases 3 or 4 weights may be not avoidable.
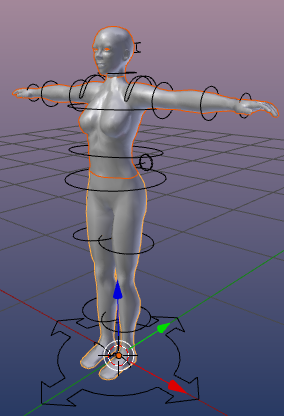
The Inspect Weights function actually uses Vertex Painting to draw a color code right on the Mesh as seen in the image

White: area controlled by one bone, Green: area controlled by 2 bones
In the above example you can see that most vertices of the Mesh are actually controlled only by one Bone (gray areas on the mesh in the image above). And you can see that typically only near the bone joints we find 2 weights on the vertices (green areas). For the SL Avatar we do not find any vertex with more than 2 Weights.
Note: Remind that each vertex has to show up in at least one weight map, otherwise you get an error “unweighted verts in mesh” when you try to import your mesh to SL or compatible worlds.