Attach preweighted Custom mesh
Purpose:
Note: If your custom mesh shall be used only for a specific shape, or when you are confident that your mesh is properly weighted, then you can fully ignore this feature.
The working model
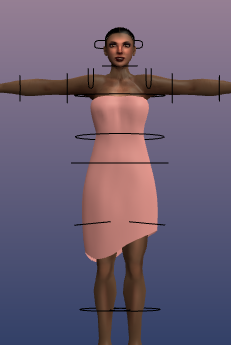
In this workflow i use a dress as my working Custom mesh. It has been designed to match the default Avastar character. Its weights have been optimized for fitted mesh, hence it already contains weight groups for Collision Volume Bones.

Basic Workflow
Bind to Armature
- Have your mesh and the Avastar figure and rig ready.
- Select both your mesh and the rig (use SHIFT RMB to add an object to your selection).
- In the Avastar Tab:
go to the Skinning panel
set the Weight option to Keep
ensure that Alter to Rest Pose is disabled.
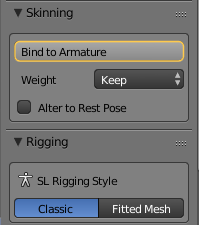
Now you are ready to press the Bind to Armature button. At this point both your mesh and rig are still selected and can stay selected for the next steps in the workflow.
Note: If you are doing Classic Rigging, the binding part is now finished.
Prepare Rig for Fitted mesh
This applies only if you want to prepare your Rig for Fitted Mesh Rigging:
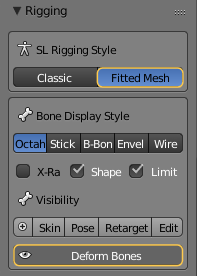
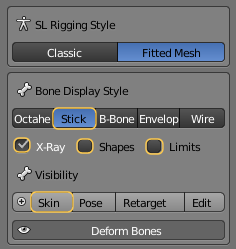
- Open the Rigging Panel and in the Rigging Style section select Fitted Mesh.
- Step back to the Skinning Panel.
- Note: You can switch your Armature to Fitted mesh Rigging at any time, even before you are binding meshes to the Armature!
- Note: The Button Deform Bones has been automatically enabled after you selected the Rigging Style.
Hint: By now you have prepared the Armature for fitted mesh, while you have kept your Custom mesh and its weight maps unchanged. (Remind that this workflow explains how to attach an already weighted mesh to Avastar, hence the preservation of the weight maps is done on purpose.)
Attach Sliders
- The mesh is now ready for you to test with sliders.
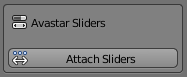
- In the Skinning Panel locate the Avastar Sliders Section and click on Attach Sliders.
- Go to the Object Properties and press Load Shape Editor (see note below). At this point you can load a Shape File (that you downloaded from SL) if you want to work with a different shape.
- Now you can modify your Character and mesh with the Avastar Sliders.
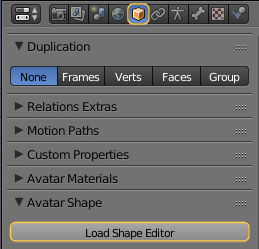
Note: Loading the Shape editor is only necessary when you open a blend file that contains an Avastar Rig right after you started Blender. In that case the Avastar Buttons are not yet initialized and the Load Shape Editor button shows up.
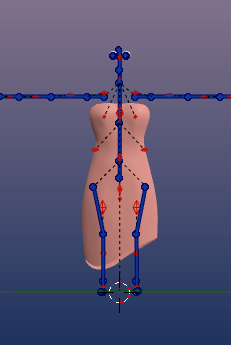
- When you are ready to proceed to weight painting, have your custom mesh selected and go to the visibility section in the Rigging Panel and enable the Skin Preset. This will make the Deform bones visible: in this case the SL Base (blue) and Collision Volume bones (orange), and put your Mesh in the weight room.
Note: The sliders do not directly change your mesh! We use Blender’s shape keys instead to store the influence of the sliders on your mesh. Hence however your Custom mesh changes while you modify slider values, these changes can later be fully reversed or applied (see below).
Slider Panel options
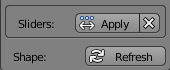
While the sliders are attached, the panel offers 3 new options:
- Apply: When you click on this button then the current shape of your mesh will be baked into the mesh itself. Technically we apply the slider shape keys to your mesh.
- X: Cancel all slider changes on your mesh. Thus you get your mesh reverted to its state just before you attached the sliders.
Note: When you cancel the Sliders (press the “X”) then the Avastar shape will also be reverted to its values just before you attached the sliders!
Then we have one more button for Shape refresh. When you press this button, then your mesh shape will be recalculated based on the current weight values. This button comes into play when you are editing the Collision Volume weights. You will press this button whenever you want to see how your changes on the weight maps influence your Custom Mesh.
Note: The Refresh Button can also be activated via the keyboard shortcut ALT Q
Additional steps
[PS-workflow title=”Load a Character shape” id=”20012″]Apply Current Slider Setting
Here we have loaded a gnome shape and slightly adjusted the resulting mesh. Now we want to keep this mesh as our new mesh base. We achieve this by clicking on the Apply button in the Sliders panel (see also further above)
 Note: This feature is most welcome when you want to create multiple variants of a mesh for different base shapes (e.g. to support the Standard size shapes published from several creators of SL Garments).
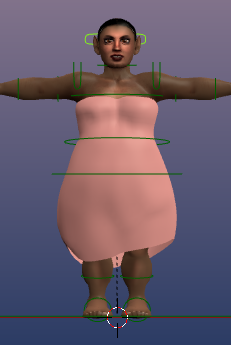
The mesh has now permanently changed from a “default Avastar dress ” to a “gnome dress”
Extended Workflow (round trip modelling)
Calculating the Morph (Theory)
When it comes to attaching shape sliders, then we have to take care of 3 things:
- The baseMesh: Is the mesh how it looks when the Avastar is in its default shape
- The currentMesh: Is the mesh for the current shape
- The sliderSettings: Are the set of slider values for the current mesh
So we can always tell that we get the currentMesh by applying the sliderSettings to the baseMesh:
currentMesh = baseMesh + sliderSettings
But in general when we attach sliders we only know the currentMesh and the sliderSettings. So attaching sliders to a mesh always needs to calculate the baseMesh:
baseMesh = currentMesh - sliderSettings
When an Avastar armature is in the Default shape (standard female) when we attempt to attach the sliders, then the baseMesh and the currentMesh are almost(*) identical. Hence we know the baseMesh in this case by definition.
But when the armature is initially in any other shape (like the gnome shape for example), then the baseMesh (default shape) and the currentMesh (the gnome) differ significantly. Now the problem is: the calculation of the baseMesh is not as straight forward as it may look.
But we found a way to recalculate the exact baseMesh from the currentMesh and the current Slider values. And once we have the baseMesh, we can again precisely calculate all meshes for any slider setting.
Looking at the BaseMesh
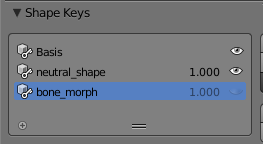
- The Basis: Is the initial mesh as it was when the sliders had been attached to the Mesh.
- The neutral_shape: Is the BaseMesh. this is what Second Life will later use as basis as well for its own calculations.
- The bone_morph: Is the current mesh with all slider values applied
As expected the neutral_shape looks almost identical to the dress as it looked in the Avastar default pose (see above).
Reverting the Morph (Practice)
So, after we have found the exact baseMesh we now can take the “Gnome Dress”, attach it to the Gnome Shape, then reset the shape to the default Avastar shape, and since the dress is attached to the sliders, we end at the default Avastar Dress again. Thus we can now do a full round trip between 2 arbitrary slider settings. And here is how it goes when we continue with the gnome shape.
Slider attachment
- Open the Tool Shelf
and locate the Sliders panel. - You simply attach the Custom mesh to the sliders by click on the Attach button.
Please be aware that attaching the Sliders may take a few seconds However this slowdown happens only once for the initial slider attachment!
Hint: The calculator uses 2 presets which can be set in the Avastar Addon Panel (See User Preferences, Addon Tab):
- Max tolerance: Try to calculate the reference mesh with that tolerance (in percent, default tolerance is 0.01%)
- Max iterations: Limit the number of iterations for calculating the best matching mesh.
Revert to Defaults
In the final sequence we will revert the Avastar shape back to the default shape to check how the dress shape changes:
- Select the armature
and open the Object properties - in the Avatar shape section
“Reset to Default Shape” - Apply the sliders.
You see the resulting mesh is not distinguishable from the initial mesh that we used to start this workflow (see far above).