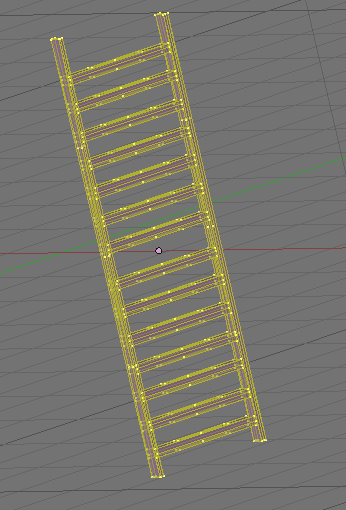
 |
Here is a small tutorial about how to make a reasonable ladder out of one sculptie. Before you start modelling you will have to decide if you want your ladder to behave well with LOD (level of Detail) or not:
|
Step 1: The initial sculptie
Lets keep things moderate and try with the secnd option. In that case you will want to start with a sculptie as follows:
- type: cylinder
- 4 x-faces
- 64 y-faces
- no subdivision levels.
You may want to rotate the object by 45 degrees along the z-axis. Now you will create the “pieces” of the ladder by collapsing every third row of faces as follows:
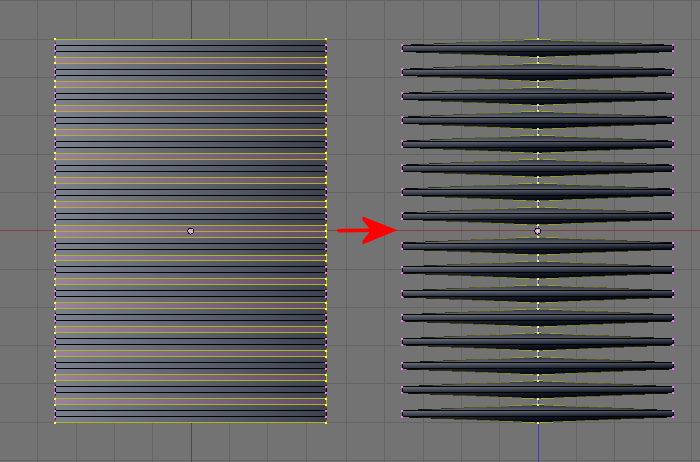
You will want to flatten each piece so that it gets the shape of a perfect rectangular solid and you will end up with a stack of 16 pieces all connected by a tiny little string in the center:
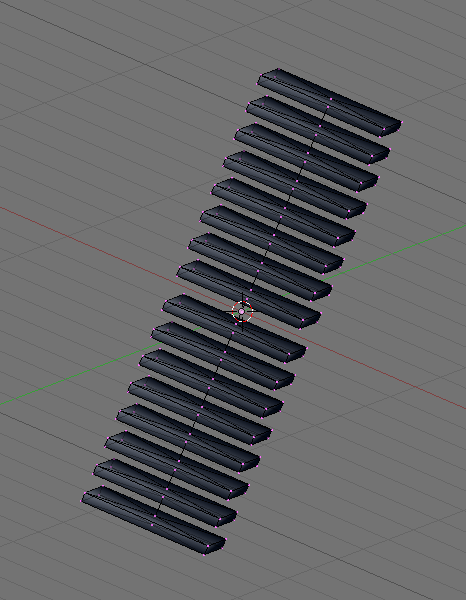
Step 2: Now let us turn to the UV editor for a moment. When you open the view -> image properties then you will see that the UV map associated to this sculptie is right now of size 8*128 pixels.
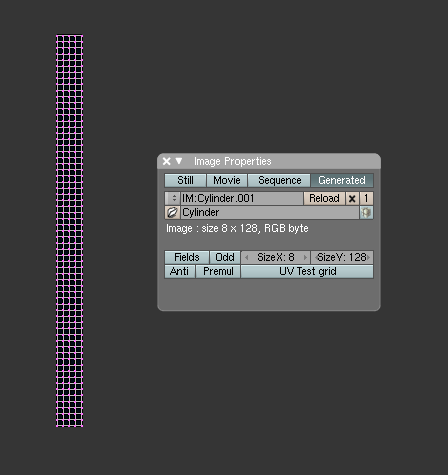
We will change that to 8*256 pixels now. (Please change that to 16*256 if you work with Phoenix or Emerald. These viewers are know to have problems with the 8*256 map) This can be done right in the properties popup window. You will end up with:
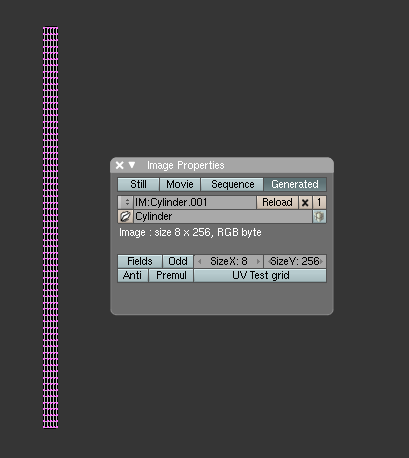
Now just rebake your sculptmap using Render -> bake sculpt meshes. The baker wil fill your sculptmap appropriately.
Why have we done this modification to the UV-map ? The baker will yield a sculptie with 4 faces in x and now 128 faces in y (8x, 128y if you used the 16*256 mapsize as mentione above). This has several implications. But let us first reimport the baked sculptie to see the effect:
- Go to Object mode
- put your initial ladder object aside
- Now in the UV-image editor: image -> import as sculptie
This will actually take your freshly baked sculptmap and create a new blender object from it. The result should look like this:
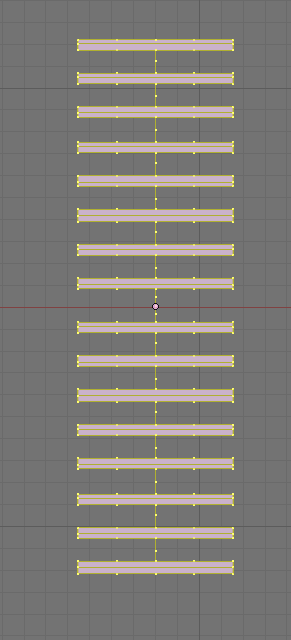
You see that now the tiny vertical string which connects the blocks has got intermediate vertices. Also the blocks have gotmore faces. So how does that help us ? Well, these additional vertices help us to keep the whole object in a good LOD balance. Remember that LOD means nothing else than:
“With moving away from the object the number of rendered vertices gets reduced more and more”.
In other words: You need vertices to “feed” the LOD daemon so that it keeps your ladder from collapsing into a wreck. So these vertices along the vertical line get eaten first. And the way how the object is constructed at the moment, this first consumption of vertices won’t harm because we cant see the tiny string anyways in SL. Of course we could have started with a sculptie of that size. But that would have forced us to deal with many more vertices during Step 1…
Step 3: We can go even one step further now. Due to a property of the Primstar baker we are allowed to remove(!) vertices in special cases. Especially we can remove isolated vertices as we can find in the vertical string. So lets do that and we end up with:
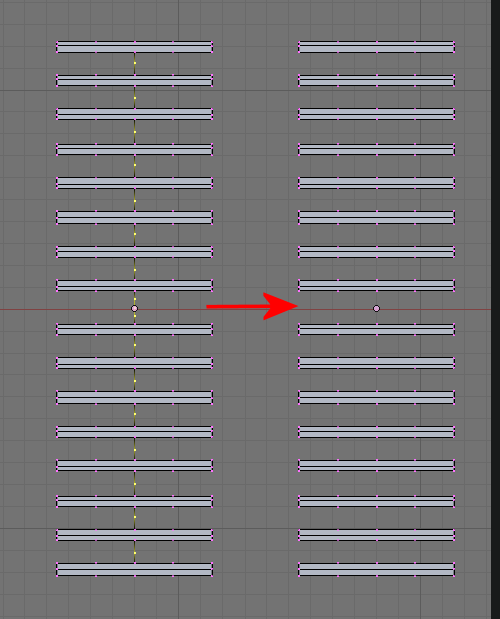
On the left we see which vertices i have selected for deletion. On the right we see the object after deletion.
Step 4: So now we do have 16 visually fully separated blocks of vertices. And we now can move these blocks around as we like. So lets make the ladder now:
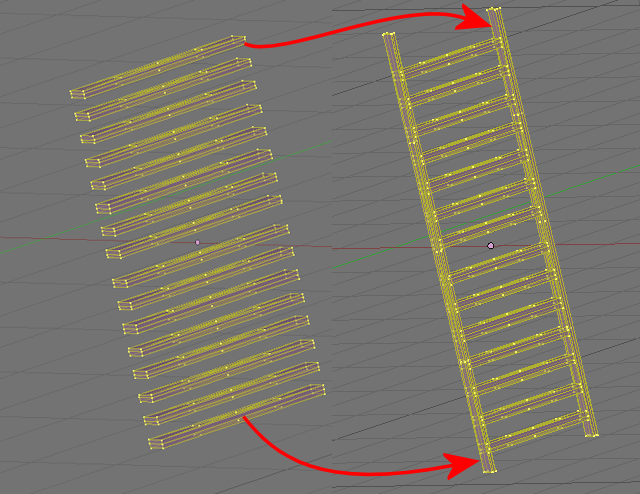
I just took the top and bottom solid, rotated them by 90 degrees and scaled them along z.
Step 5: Now in the final step we bake the sculptie again. And then we reimport the baked sculptie for inspection:
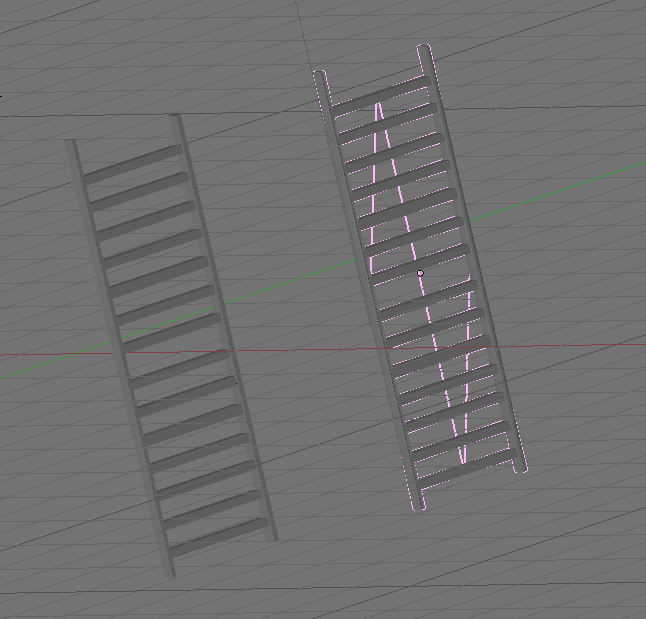
So here you see the “original” sculptie with the removed vertices on the left. And the baked and reimported sculptie on the right. The zig-zag line in the middle of the ladder has been brought in by the baker tool. But do not chocke on that. That is again the tiny little but invisible string which connects the pieces of the sculptie all together.
If you use Emerald or Phoenix then ensure that you use the map size: 16*256 pixels. Otherwise the mentioned viewers display massive distortions. This is a known bug in Phoenix.
This tutorial was quick and dirty and it does not explain an awfull lot. But if you work through it and inspect your object closely at each step in the process you will eventually understand how the baker does its job and what you can achieve with this technique concerning “complex objects from single sculptie”.
And be aware that texturiong these sculpties can be done but is not at all trivial.
Have fun
Gaia